Wednesday, July 28, 2021

 Auntie Jan's Crab Dip


1 part Grated Swiss Cheese

1 part mayonnaise

1/2 part grated red onion

Mix together and bake at 325° for 25-30 minute res, or until mixture bubble and has lightly browned edges.

Chill in fridge overnight.


Saturday, July 25, 2015

Monday, June 22, 2015

You Can Pickle That: the Universal Pickle Recipe

6/19/2015 10:44:00 AM
 dill spears IMG_3543
The long history of the word “pickle” tells you all you need to know about making pickles at home.
The word first appeared in English during the obscure centuries before Chaucer, and it likely originated from an even older root word meaning “a thing that pricks or has piquancy.” By Shakespeare’s day—roughly 400 years ago—“pickle” had developed its modern usage. In Anthony and Cleopatra, the queen threatens to have a servant whipped with wires and thrown into a vat of pickling brine, which she promises will be a stinging punishment. The poor guy was about to find himself “in a pickle” as we would say today—thrown into an uncomfortable situation.
The takeaway is that a pickle’s tangy taste—its pleasant, mild sting—is caused byacidity. At the most basic level, a pickle is nothing more than a vegetable submerged in an acidic liquid. From a food preservation standpoint, acidity is what preserves the vegetable, and as mentioned in my last post, acidity is also the silver bullet against botulism and other food-borne disease.
This Universal Pickle Recipe uses vinegar for acidity, and it’s one of a class known as “vinegar pickles” or “quick pickles.” In addition to the familiar cucumber pickles, you can also use this recipe to pickle sturdy vegetables including green beans, zucchini, carrots, celery, onions, beets, and even some greens, as described below. 
The technique is safe, very easy, and flexible enough to adapt to almost any taste.

The Basic Brine

According to USDA guidelines, the key ratio for making pickle brine is one part vinegar to one part water. Note that the vinegar must have at least 5% acidity. (Most do, but check the label to verify.) Always use the best vinegar you can get, comparable to what you would use to make salad dressing, because the vinegar will be the most pronounced flavor in the jar. The quality of the pickle is in the brine.
My favorite vinegar for pickling is mild white wine vinegar, followed by lightly sweet apple cider vinegar. Red wine vinegar works well with beets. Malt vinegar is good with onions. (Balsamic vinegar can also work with onions.) The only vinegar I avoid is white vinegar with its harsh, tongue-stripping flavor and cleaning-product smell. Note that rice vinegar is usually 4 percent acidity.
Seasoning the Brine
So long as you stick to the basic ration of one part 5 percent vinegar to one part water, you can season your pickling brine to taste. Salt is always a key component, both for flavor and because the salt helps to crisp the vegetable. Almost all pickles also contain spices, and you can add any combination of black peppercorns, dill seed, coriander seed, cumin seed, mustard seed, allspice, mace, cinnamon, cloves, saffron, etc. (Ready-made pickling spice, available at the grocery store, pre-mixes some of the above.) I often use aromatic fresh herbs for flavor, such as dill weed, tarragon, basil, Thai basil, etc. Feel free to also add a clove of garlic, a slice of shallot, or a few cocktail onions to every jar. Dried red chilies or a slice of jalapeƱo pepper give heat. Finally, some pickles benefit from a touch of sweetness: for pickled ramps, I stir in a bit of honey or sugar.
Again, as long as you stick to the basic 1:1 ratio, you can flavor the brine with any of the above seasonings. Go wild with your creativity.
green beans IMG_5801

Vegetable Pro Tips

Wash and trim the vegetables as you would for making a salad or a vegetable side dish. Cut them into whatever bite-sized shapes you like—spears, sticks, chunks, rounds, or wavy-cut chips. I always spend a little extra time to cut the vegetables neatly: pretty counts. You can pack the vegetables into yours jar raw, blanched, or cooked.
Here are a few specific pro tips to get you started.
Cucumbers: The varieties sold as Kirby or pickling cucumbers will give you the best crunch, but other types work as well. Generally I don’t peel cucumbers. For the best texture: trim and cut the cucumbers. Sprinkle with two tablespoons of kosher salt, and toss to distribute the salt. Place the cucumbers in a colander, cover with two trays of ice, and set aside for two hours. Rinse quickly in cold water, then pack raw.
Green beans: Before packing, blanch the beans lightly in salted water for 90 seconds, then “shock” in an ice-water bath to arrest cooking.
Summer Squash, including zucchini: Zucchini make wonderful pickles. (My secret ingredient is a pinch of saffron in the brine.) Slice yellow crookneck squash into rounds. If you wish, salt and drain any summer squash, as for cucumbers.
Carrots: Before packing, blanch for two to three minutes in salted water. Shock in an ice-water bath.
Onions and garlic: All the allium, including ramps and garlic scapes, make delicious and useful pickles. Garlic cloves will sometimes turn bright blue or green from chemical reactions: don’t worry, they are still safe to eat.
Beets: Before packing, boil or roast whole beets until tender, 30-60 minutes depending on size. Slip them out of their skins and cut into manageable pieces.
Greens: Chard stems, trimmed into sticks and lightly blanched in salted water, make good pickles. Purslane, a succulent wild green, is one of my favorite pickles—flavor the brine with lots of whole coriander seed.
Herbs: If you have an abundance of tarragon or Thai basil, fill a jar with a several fronds of fresh herbs, and cover with straight, undiluted vinegar. The resulting aromatic vinegar will last indefinitely.

Storage

Vinegar pickles can be canned for long-term shelf storage, if you like. (More on that in an upcoming post.) But for the best flavor and crispest texture, I store the sealed jars in the refrigerator, where they will keep for weeks.
ramps IMG_7083

The Universal Pickling Recipe

Yields two quarts
Like a one-size-fits-all garment, this recipe may require minor adjustments to fit your needs. In testing the recipe yesterday, for instance, I found that I needed a touch over two pounds of cucumbers to fill two quart jars, but two pounds of small, tender green beans fit exactly.
Ingredients:
• 2 pounds fresh, firm vegetables, such as cucumbers, squash, green beans, etc.
• 2 cups 5-percent vinegar
• 2 cups water
• 1 tbsp kosher salt (or half as much fine sea salt)
• optional: 1 teaspoon honey or sugar
• 2 whole garlic cloves, peeled and lightly crushed
• 4-6 three-inch fronds of fresh herb, such as dill weed, tarragon, Thai basil, etc.
• 1/2 tsp black peppercorns
• 1/2 tsp whole-seed spices, such as coriander or mustard
• optional: a very few "woody" spices, such as four whole cloves
• optional: two small dried red chili or slices of hot pepper
• optional: two thick slices of shallot or a half-dozen pearl onions
Directions:
1. Trim and slice the vegetables as if making a salad or vegetable side dish. (See above for suggestions.)
2. Combine the vinegar, water, salt, and sugar or honey, if using, in a small pot. Bring to a boil, and remove from heat.
3. Pack the vegetables snugly into two clean quart jars. As you work, add the garlic and fresh herbs. At the end, add the peppercorns and whole-seed spices. Add the optional woody spices, chilies, hot pepper, shallot, or onions, if using.
4. Bring the vinegar brine back to a boil, and ladle over the vegetables to fill the jar. Seal the jars. Allow to cool overnight, and store in the refrigerator for up to a month.
Next up in Home Canning 101: the Universal Fermenting Recipe.

Tuesday, July 24, 2012

Fruit cobbler for Keegan and Tracy


Fruit Cobbler

4 1/2 Cups Flour (1 1/2)
1 1/2 Cups Sugar (1/2)
6 Tsp. Baking Powder (2)
3/4 Tsp. Salt (1/4)
1/2 Almond Extract (1/4)
1 1/2 Cups Unsalted Butter, cold, cut into cubes (1/2)
3 Eggs (1)
1 1/2 Cup Milk (1/2)

Use numbers in parentheses for 8" x 8" pan or 9" pie plate. Full recipe fills 9" x 13" or 12"x 16"  pan.

Sift together flour, sugar, baking powder, and salt.  Add almond extract.  In bowl of Cuisinart or with 2 knives, cut in butter until it is the size of peas.
Beat eggs and milk together.  Mix with dry ingredients until wet.

Fill 12" x 16" pan  or 9" pie plate with sliced fruit.  Add 3/4-cup sugar (1/4 cup), 3/4-cup flour (1/4 cup), mix all together and dot with 1/4 (2 Tbsp.) butter.

Pour topping over fruit mix.  Sprinkle with almond slices.
Bake at 350 degrees until crust is done.  It will take at least an hour, maybe 1 1/2 hours or 2 for the large pan. The smaller cobbler should take 50-55 minutes.
Serve with whipped cream or Vanilla ice cream.

Tuesday, June 5, 2012

Mattar Panir (Paneer) Cheese and Peas from India


Cheese and Peas

Indian Mattar Panir

My Favorite Vegetarian Dish

Can be Vegan using Tofu, pressed, cubed and sautĆ©ed.  We called "Give Peas a Chance" on the specials board at the CafĆ©.

For the Cheese:
Heat to scalding:
2 quarts whole Milk
1/2 cup Yogurt
When bubbles form around the edge, add:
3 Tbsp. Lemon Juice
Turn off the heat.  The mixture should curdle.  Line a colander with cheesecloth and pour the curds and whey through. Reserve the whey. Bring up the ends of the cheesecloth around the curds and press into a ball.  Weigh down for 8 hours between two boards topped with a heavy cast iron skillet, or some item of equal heaviness.
Remove cheese from cloth and cut into 1/2-inch cubes.

For the dish:
SautƩ until golden brown on all sides:
3 Tbsp. Ghee
the Cheese cubes
SautƩ for 1-2 minutes and remove from pan:
3 Tbsp. Ghee (clarified butter)
2 Tbsp. Ginger, grated
1 Tbsp. Garlic, minced
SautƩ until translucent:
1 cup Onions, sliced thinly
Add and sautƩ for 2-3 minutes:
1 tsp. Salt
1 tsp. Turmeric, ground
1/4 tsp. Cayenne
1 tsp. Coriander
1 Tbsp. Garam Masala
Add and cook for 3 minutes:
2 cup fresh Tomatoes, finely chopped
the reserved Ginger and Garlic
Add and cook for another 3 minutes:
1 1/2 cups Peas, shelled (frozen peas are fine!)
1 tsp. Sugar
3 Tbsp. Cilantro
the sautƩed Cheese Cubes
1 cup of reserved Whey
Serve over steamed Basmati Rice with a garnish of fresh Cilantro Sprigs and crisp Pappadums.


Garam Masala

Garam Masala is a toasted blend of spices used frequently in Indian cooking instead of the ubiquitous Curry Powder.  It can now be purchased in the spice section of many Natural Foods stores, but it is easy and fun to make your own, and the results are astronomically better.  I often halve this and store it in a glass jar.  It keeps for quite awhile.

Roast together in one layer, at 200 degrees, for 30 minutes.  Cool and grind in a spice or coffee grinder.

5     3" Cinnamon sticks
10 Cardamom Pods, whole
1/2 Cup Cloves, whole
1/2-Cup Cumin Seeds, whole
1/4-Cup Coriander Seeds, whole
1/2 Cup Peppercorns, whole

Friday, March 30, 2012

Gluten-free Pumpkin Cornbread

Sometimes I just crave a good cornbread to go with some beans or, as last night, with some BBQ chicken and cole slaw.  I've been experimenting with Flaxseed meal flour and Coconut flour, so I decided to experiment by combining them with cornmeal to make a tasty cornbread.  Coconut flour and Flaxseed meal absorb quite a bit of liquid, so I played around until I got the right consisitency.  It's best to let the batter sit a few minutes to let the flours absorb what liquid they will.
I also have a passion for making things out of squash and pumpkin; I had a package of homegrown in the freezer, so I used that.  It may have been a little moister that canned, so adjust accordingly.
Bob's Red Mill makes Flaxseed Meal and Coconut Flour.  I also buy coconut products in bulk at Tropical Traditions
I wish I had added a bit of orange peel, as the leftover cornbread tasted quite a bit like Poppyseed Cake in the morning..


Pumpkin Cornbread
The Recipe:
Dry Ingredients:

1 1/2 cups yellow cornmeal
1/2 cup flaxseed meal
1/4 cup coconut flour
1 Tbsp baking powder
1/2 tsp baking soda
3/4 tsp salt
Wet Ingredients:

1 1/2 cups pureed squash or pumpkin, use homemade or canned
4 eggs
4 Tbsp. Coconut Oil, melted (or butter or vegetable shortening)
4 Tbsp. Honey
A little almond milk if batter needs to be moistened

Grease an 8" x 8" pan with coconut oil or other shortening.  Preheat oven to 375 degrees F.
Bake for 35-45 minutes.  This recipe takes a little longer than regular cornbread as it is dense.  Test with a toothpick until it comes out clean.

Friday, March 2, 2012

PRESERVED LEMONS Organic Eureka and Meyer, Moroccan Style


I had these with fresh fried anchovies and fennel the other night. They are with Moroccan Food and grilled meats. I think they would do well with Vegetable Tagines and grains also. I have to wait until mine are cured until I try them.  You can top them with oil when they are ready.  Just take out a quarter of a lemon when you are ready to use them, scrape off the pulp, and dice the soft peel.  I had them in a Chicken Liver saute over Quinoa last night, and this AM, in a Chilaquiles Egg and Avocado dish.  You can also toss the peel in salads and use the oil in the dressing.
There are 2 colors of lemons, as i did not buy quite enough Meyers to fill up the jar, so I used some Organic Eureka lemons to fill.  Either one works, and it's always a good idea to have extras on hand to top off the juice.


If you wish to soften the peel first, soak the lemons in luke warm water for 3 days, changing the water daily.


I have been using these tangy salty tidbits in everything from guacamole, sauteed fish, pork chops, salads, tabbouleh and more.


Preserved Lemons, Moroccan Style
Makes one quart jar

* 6-8 organic meyer lemons, washed and dried plus a couple of extra for juice, if needed
* Salt (use either kosher salt or a coarse sea salt, do NOT use table salt)
* Sterilized quart jar with lid
Directions
1. Remove any stems and slice a deep X into each end of the lemon - you're basically cutting each lemon nearly into quarters but not going all the way through.

2. Working over a stainless bowl, pour  salt into both ends of the semi-open lemon to cover the exposed pulp.

3. Pour a layer of salt into the bottom of the quart jar and then press the salt-filled lemon into the bottom of jar and repeat with the remaining lemons.

4. Press the lemons down to release their juice - the liquid should cover them or nearly cover them if you're working with less juicy lemons. You can fill the jar right up to the top since the lemons will reduce as they pickle. Top with a couple tablespoons of salt.  If you don't have enough juice, use freshly squeezed to bring the level up and over the lemons.  Leave some air space before sealing the jar.

You can also add spices if you like - some of the more common options are bay leaf, cinnamon stick, peppercorns and whole cloves.

5. Seal the jar well and leave out for 2-3 days, turning the jar upside down each day to distribute the salt and juice; press the lemons down once a day to make sure they're sitting below the lemon juice to ensure preservation and to soften them.

6. Move the lemons to the fridge and wait three weeks before using to allow the rinds to pickle fully. To use, rinse the lemons, scrape off the pulp, discard any seeds and chop or mince the rind. They'll keep in the fridge for up to 6 months.  Top off with Olive Oil if necessary.


Alternatively, Paula Wolfert uses this method, although I used the above refrigeration method:


"Let the lemons ripen in a warm place, turning the jar upside down each day to distribute the salt and juice.  Let ripen for 30 days.
To use rinse the lemons, as needed, under running water, removing and discarding the pulp, if desired--there is no need to refrigerate after opening.  Preserved lemons will keep up to a year, and the pickling juice can be used two or three times over the course of a year.

Saturday, January 7, 2012

Paleo Coconut Flour Berry Pancakes Gluten-free

Paleo Gluten Free Coconut Berry Pancakes

What cave people ate for breakfast? Probably not.  Even so........

This is a good low-carb way to start the day. The high protein content also helps keep one satisfied for many hours. The berries add antioxidants and just plain deliciousness. The recipe is adapted from a recipe by Brokeassgourmet.com While I am not following a strict Paleo diet (I find it too strict for me), I find that the baking recipes which use coconut, flax, or almond flour and lots of eggs, are great and easy to make. I don't know how they hold up leftover; there weren't any.

INGREDIENTS
4 eggs
1 cup almond milk
2 tsp agave syrup
1/2 cup coconut flour
1/4 cup almond flour
1 tsp. baking powder
1/2 tsp salt
1 cup frozen huckleberries (if you are so industrious and lucky) or blueberries, fresh or frozen
oil for frying

Beat eggs until fluffy (I used a stand mixer here). Whisk in milk and agave until well-incorporated.
Combine, in a separate bowl coconut flour, almond flour, baking powder and salt. Pour in liquid ingredients and stir just until combined, and then gently stir in the berries.
Heat a griddle or large non-stick frying pan. and heat enough oil to coat over medium heat.
Working in batches, pour batter in 1/8-cup increments into the hot oiled pan. Cook until pancakes are brown on the bottom and the edges begin to dry out, about 2-3 minutes. It's very important to give them enough time, longer than other wheat pancakes, or they will fall apart. You will get it after the first try or so. Gently flip and cook until the other side is golden brown (this doesn't take as long as the first side).
Serve hot with butter or pseudo-butter, syrup, honey, jam or on their own.
Makes about 16 dollar size pancakes.
Serves 2-3.

Monday, September 26, 2011

Teriyaki Sauce

Teriyaki Sauce

 1 cup Sherry or Mirin
1 1/2 Cups Honey
2 Cups Shoyu Soy Sauce
3 Tbsp. Each, Ginger and Garlic, chopped
1/2 Cup Pineapple, crushed

Bring to a boil, add, stirring, 3 Tbsp. Cornstarch dissolved in hot water.  Stir until thickened slightly.  

This recipe can be halved or kept in refrigerator for a quick meal almost indefinitely

Sunday, September 11, 2011

Heirloom Tomato Chutney

Heirloom Tomato Chutney

Makes 12 half-pint jars with some extra for sampling

Mix together in a heavy-bottomed pot:
18 cups Heirloom tomatoes, cut in small pieces (cherry tomatoes can be halved or left whole)
6 cups granulated sugar
1 tbsp. salt
3 cups sliced crystallized ginger
2 cups apple cider vinegar
2 Tbsp. Garam Masala
4 3-inch pieces cinnamon stick
2 lemons, thinly sliced

Bring to a boil over medium heat, stirring until sugar is dissolved.  Cook down on medium-low heat until mixture is thick.  Stir frequently, especially towards the end, to prevent sticking and burning.

Ladle into hot, sterilized canning jars.  Seal.  Process in boiling water bath for 10 minutes.

Remove from canner and cool in a place free from drafts for 24 hours.  Label and store.


Friday, August 26, 2011

Coconut Flour Chronicles: Episode One, Coconut Flour Cupcakes with Chocolate Frosting


Coconut flour is something of a magical ingredient for me right now.  I am trying to find zuzus to bake and snack on that are mostly guilt-free....meaning carbohydrate free. Coconut flour is high in fiber, low in digestible carbs and a source of protein.  It also is somewhat naturally sweet, so added sweetening tends to be low to make a nice treat.

Many of the recipes I have been trying use a lot of eggs; that adds substantial protein to the product.  These cupcakes, because of the low carb and high protein factor are satisfying for quite a while.  They do have a good fat content, but I find that one cupcake is enough.

The finished product is not-too-sweet, light and souffle-like and very moist.  They have been a hit where ever they have gone.

Gluten Free Vanilla Cupcakes with Vegan Chocolate Frosting

Preheat oven to 350 degrees F. Oil a muffin tin pan or line with paper baking cups.

Ingredients:
½ cup coconut flour, sifted
½ teaspoon sea salt
¼ teaspoon baking soda
6 large eggs (using fresh local free-range gives the cupcakes a lovely golden color)
½ cup canola or other lightly flavored oil
½ cup agave nectar
1 tablespoon vanilla extract

In a bowl, combine coconut flour, salt and baking soda; whisk until mixed.
In another bowl, blend together eggs,  oil, agave and vanilla.
Mix wet ingredients into dry and blend with a mixer or hand blender until smooth.  The mixture will be loose at first and hard to mix with a whisk, but if you walk away for a couple of minutes, the coconut flour absorbs the moisture and it will whisk up like crepe batter.
Pour batter into prepared muffin pans.
Bake at 350° for 18-20 minutes
Cool completely.
Top with chocolate frosting
Makes 12 cupcakes

Vegan Cream Cheese Frosting

I used a combo frosting because I had some Vegan Cream Cheese I wanted to use up.  It has more sugar than I would like, and I will try the Vegan Chocolate frosting which follows it next time.

Melt 1/2 cup semi-sweet chocolate chips with 1 Tbsp. oil.  Beat in a food processor, 1/2 cup vegan cream cheese and 1/2 cup vegan butter.  Add 1 tsp. vanilla, a pinch of salt, and the melted chocolate; blend until smooth.  Add 1 1/2 to 2 cups powdered sugar, processing until smooth.

Vegan Chocolate Frosting
1 cup dark chocolate chips
½ cup canola oil
2 tablespoons agave nectar
1 tablespoon vanilla extract
pinch sea salt
In a small saucepan over very low heat, melt chocolate and oil
Stir in agave, vanilla and salt
Place frosting in freezer for 15 minutes to chill and thicken
Remove from freezer and whip frosting with a hand blender until it is thick and fluffy
Frost the cupcakes with a couple of tablespoons of either frosting.  The grandson immediately figured out which cupcake had the most frosting.  Quality control...the next generation.


Sunday, August 21, 2011

Cheesy Kale Chips


These became my favorite snack when I recently bought a package from a friend.  I hoarded them in a little bag for a week before I finally finished them.  They were an antidote to between meal hunger pangs, and I wanted more.  I have lots of kale in my garden, and I can beg some from my son's in a pinch, so I decided to see if I could make them.

I found a fairly simple recipe; I even had all the ingredients on hand.  I do have a dehydrator, but I thought maybe I could make them in the oven instead, as the dehydrator takes up a lot of room.  I didn't want a spicy mixture on the leaves, but cayenne or other spicy spices can be added at will.


The Cheesy Kale Chips

4 cups Purple, Lacinato, or Red Russian kale, torn into bite-size pieces (stems removed) washed and spun dry.
1 cup cashews (soaked 1 hour)
1 red bell pepper
2 Tbsp lemon juice (about 1 large lemon)
1 Tbsp nutritional yeast
1 clove garlic
1 tsp onion powder
1/4 tsp Sea Salt salt

Blend all ingredients, except for the kale, in a food processor or high speed blender until smooth. In a separate bowl toss the kale in the "cheese" sauce and mix well to incorporate and coat all the leaves. Spread the kale evenly on a teflex sheet and dehydrate on 115 degrees for 16-20 hours, or until dry and crunchy. If using the oven method, preheat the oven to 200 degrees F. and bake on parchment lined baking sheets for 1 to 1/2 hours or until dry and crunchy. Fluff them up about half way through to make sure they get evenly dehydrated.

Easy easy easy.  Snack, crunch and enjoy.  These are really expensive in the shops and markets.


Monday, August 15, 2011

Fusion Chimichanga Samosas with Coriander Chutney


Fusion  Samosa Chimichangas


Samosas are a traditional Indian pastry snack made with potatoes and fresh vegetables cooked with spices, wrapped in a flour dough and fried or baked.  I have made my own dough and used phyllo dough also.  Now I am jumping continents and wrapping them in an whole wheat flour tortilla.  Leftovers are good as taco filling the next day; just toast a tortilla over the gas flame, fill, fold and eat.

Samosas are traditionally served with some kind of spicy sauce: fresh chutney, preserved chutney, flavorful raita, or other pungent dip.  I like mine with a fresh coriander chutney; few ingredients and it's very easy to make.

This recipe is adapted from one by Emeril Lagasse; it also looks similar to the recipe in Veganomicon, my new favorite cookbook.  When I first made these with whole wheat flour tortillas, I softened them, filled them, and put them in the oven.  They came out a little tough that way, although they were ultimately delicious.  

Substitute any vegetables you have on hand or in the garden.  I used fresh green beans sliced into 1/2" lengths, and I may use zucchini next time since they are abundant now.


Ingredients:
2 Tbsp. oil or ghee
1 tsp. mustard seeds, yellow or brown
1/2 cup chopped yellow onions
2 teaspoons minced fresh ginger
2 teaspoons minced garlic
2 hot green chile peppers, minced
1 teaspoon garam masala
1 teaspoon salt
1/2 teaspoon turmeric
1/8 teaspoon cayenne
2 large baking potatoes, like russets, about 1 1/2 pounds, peeled, cut into 1/2-inch dice, and boiled until just tender
1 small carrot, quartered and sliced 1/4"
1/2 cup par-cooked and drained green peas
2 tablespoons chopped fresh cilantro leaves
2 teaspoons fresh lemon or lime juice

Directions:
Heat oil or ghee; add mustard seeds and cook till they pop. Saute onions until translucent, add garlic and ginger; saute a few minutes.  Add spices and cook, stirring 3 minutes.  Add vegetables and 1/2 cup water.  Cover, and simmer until potatoes are tender.  Remove from heat, check for seasoning, and cool.

Soften tortillas and roll up with 4 tbsp. filling, lengthtwise, burrito style. Place in lightly greased baking dish, brush the tops of the chimichangas with oil, and bake at 350 degrees for 20 minutes.

Serve with fresh Coriander chutney

BASIC CORIANDER (GREEN) CHUTNEY RECIPE

Ingredients:
1 bunch fresh mint
1 bunch fresh coriander
5 cloves garlic
1" piece of ginger
2 green chillies
1 tsp sugar
1/2 tsp salt
2 tsps lime juice

Preparation:
Cut off roots from the coriander and any thick stalks from the mint and discard. You should now have enough coriander and mint to loosely fill 1 1/2 to 2 cups with each of them.
Peel garlic and ginger and remove stalks from green chillies. Wash all these ingredients thoroughly.
Grind all the ingredients (including the salt which you can add more of later to suit your taste) into a smooth paste in a food processor.
Chill and serve.


Variations: All coriander or a Mint Mango with a little yogurt


Friday, August 5, 2011

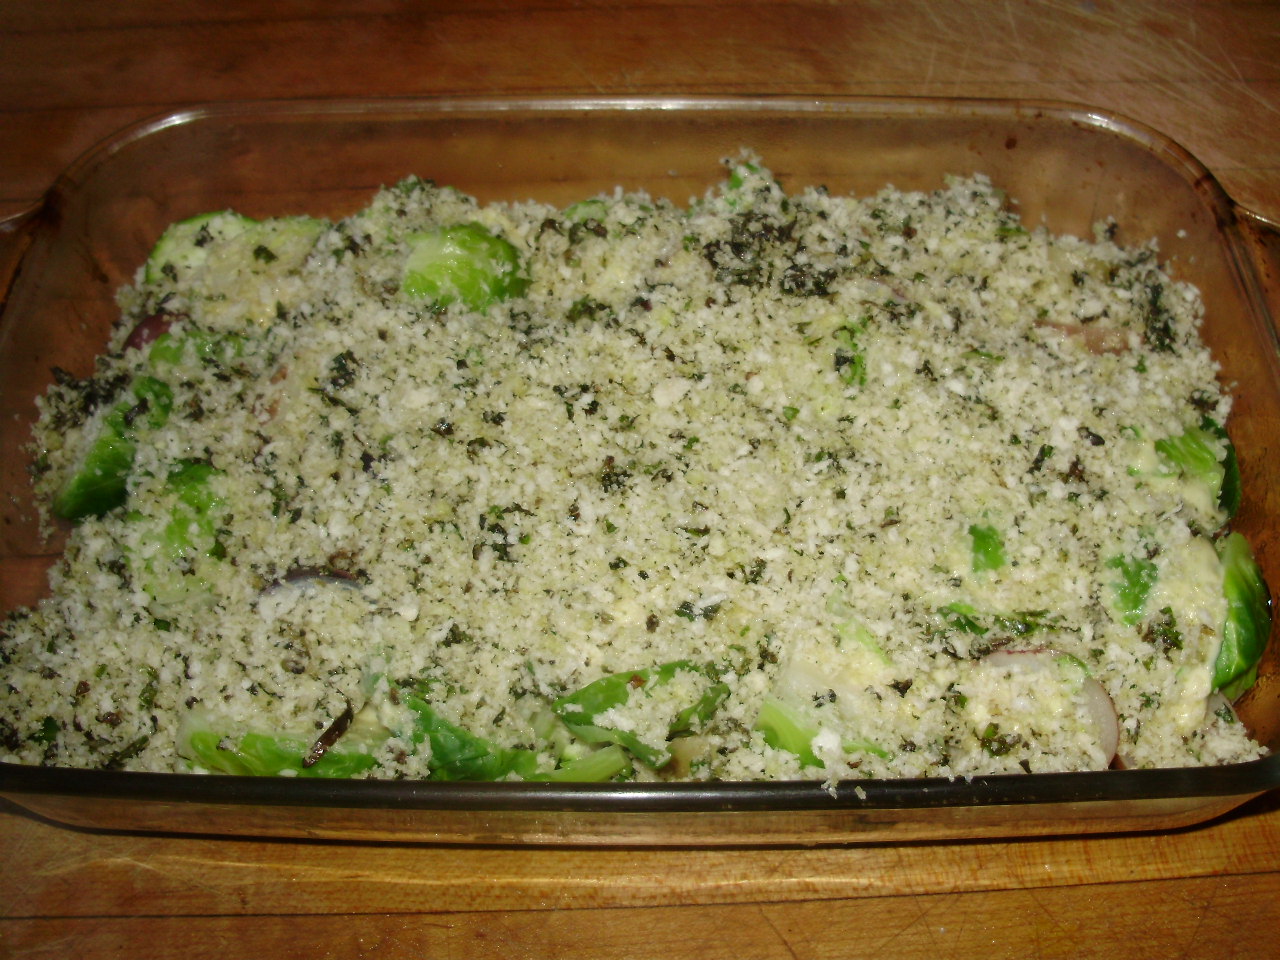
Vegan Cheezy Summer Vegetable Gratin


I made this impromptu casserole tonight with an assortment of fresh veggies from the farm and from the market.
The Cashew cheese gives it a nice richness without dairy, and the Panko crust has a wonderful crunch.  Of course, any combination of vegetables you have or like can be used here.  You need to make sure that once they get into the pan, they will cook to doneness in the same amount of time.

Preheat oven to 350:
For the Casserole:
2 Tbsp. Olive Oil
1 medium sliced Zucchini
10 Cherry Tomatoes, halves
10 Brussel Sprouts, halved and steamed until crisp tender
5 small potatoes, halved and steamed until tender
Salt and Pepper, to taste
1/2 cup homemade Cashew Cheese

For the Topping:
2 cloves Garlic, peeled and minced
1/2 cup fresh Basil, chopped
1 1/2 cups Panko bread crumbs
2 Tbsp. Olive Oil

Oil a 7 1/2" x 11" glass  baking pan with the 2 Tbsp. oil.  Spread the sliced zucchini and tomatoes across the bottom.  Layer on the brussel sprouts and potatoes.
Season with salt and pepper. Spread the Cashew cheese by the spoonful over the top and spread thinly.

Mix topping ingredients together.  You can do this in a processor or by hand.  Spread evenly over the top of the casserole.

Bake for 25 minutes or until crust is golden and zucchini cooked through.

Cashew Cheese--a Satisfying Non-Dairy Alternative

I just started making this stuff a week ago, and now I am totally hooked.  I am avoiding dairy for health reasons, so I did some research and started using this homemade Cashew cheese sauce.  We eat a lot of tostadas in the summer because we have lots of veggies from the garden, and I can mix and match.  I used the cheese sauce and served grated cheddar on my husband's meal, and this stuff is sooo good I did not feel in the least bit jealous or deprived.

This sauce is very easy to execute; it only takes a few seconds after the cashews are toasted.  The last time I bought already roasted cashews (non-salted) from Harvest Market, and it was even easier and quicker.  It's hard for me to heat the oven for such a small thing; I think it's wasteful.

This cheese sauce is adaptable for many uses--a little more lemon and a sprinkle of cayenne and it's Hollandaise Sauce for a Benedict or Rancheros.  Add some diced, roasted and peeled green chilies, and it's a Chile non Queso dip or sauce for Nachos.  A little tomato paste or sun-dried tomato and a bit of spice will make it a sauce for Welsh Rarebit, a nice easy dinner served on whole wheat toast. You can also thicken it with potato or cornstarch for Macaroni and Cheese or a garden vegetable gratin.


CASHEW CHEESE SAUCE

INGREDIENTS:
·         ¼ cup nutritional yeast flakes
·         1 teaspoon onion powder
·         1 cup water
·         1/4 teaspoon garlic powder
·         1 cup raw cashews (or toasted cashews from health food store)
·         1 teaspoon salt
·         1/2 cup canola oil
·         1/2 cup extra virgin olive oil
·         1/3 cup lemon juice

DIRECTIONS:
If toasting your raw cashews, reheat oven to 350 degrees. Spread raw cashews on baking sheet and bake for 7-10 minutes. Keep an eye and nose on them, as they can burn quickly. Remove and cool completely.

In afood processor add nutritional yeast, onion powder, water , garlic powder and salt. Blend until the cashews are liquefied. Keep the food processor running and slowing add the oils through the feeding tube. When oils have been added and mixture begins to thicken, add the lemon juice until well blended.

Store Cashew Cheese in an airtight container in the refrigerator. I have stored it for as long as a week.

Saturday, July 30, 2011

On Beyond Chutney.....Foogaths: A South Indian Accompaniment

Now that gardens are overflowing with fresh vegetables, it's time to check out new ways of preparing them.  A Foogath is a savory accompaniment usually made with vegetables or green fruit and coconut.  It is different from a sambal in that it is cooked.  These recipes are adapted from an old cookbook of my dad's, "Indian Cookery" by E. P. Veerasawmy, originally published in 1936, London. The cooking process for foogaths is basically the same as for stir-fry.  First you prepare vegetables by washing, slicing, and sometimes parboiling. Adding seasonings to hot oil comes next: spices, ginger, chilies, seeds--whatever needs to
cook a few minutes first.  Then the onion are cooked to a soft transparent state, and the vegetables are added and cooked to doneness.  Lastly, the coconut, and fresh leaves of coriander are added before serving.

Almost any vegetable can be turned into a tasty foogath, and they are well-suited for using up leftovers.  In India, freshly scraped coconut is used, but few in this country have the time or resources to do this, so dried coconut can be used instead, finely shredded or flaked.  Just make sure it's unsweetened coconut.  Serve the foogaths hot with rice or chapatis, as a side dish or a dip.

One of the many popular Foogaths is made with fresh green beans.  They are abundant in the garden this time of year and readily available in markets almost year round.  This recipe includes the addition of fresh curry leaves, common in South Indian cooking, but not often available in this country outside Indian and Asian Markets.  Amazon.com has a few listings for the fresh leaves at this time. Dried is available and can be substituted, or you can grow your own plants in a warm place.  The Murraya koenigii plant is an attactive bushy shrub; it grows from fresh seeds which are available seasonally on the Internet from Amazon, eBay and Tropical Seed companies.  The sauteed leaves add a pungent tone to the dish.


Green Bean Foogath with Quinoa Pilaf


For the Foogath:

Ingredients:

1 lb. french beans  cut into approximately 3/4" lengths or sliced into thin rings if dish is for a dip
2 tbsps oil
3/4 tsp brown mustard seeds
2 green chillies chopped fine
6-8 curry leaves washed and dried on paper towels
1 large onion chopped fine
8 Tbsps fresh grated coconut or substitute finely shredded dried coconut
Salt to taste
juice of 1 lemon
2 tbsps finely chopped coriander leaves

Preparation:

Heat the oil in a shallow pan and add mustard seeds. When they stop spluttering add the curry leaves and green chillies and sautƩ a little.
Now add the onion and fry until it softens.
Add the green beans, salt to taste and cook till they are done to your liking.  I like mine to be crisp, but tender and still very green.
Add the grated coconut, squeeze the lemon over all,  and mix well. Cook for another minute and then turn off the flame.

I had this for lunch with the leftover quinoa pilaf from the previous night's dinner.  Fabulous, vegan, and nutritious.


Drumstick or Zucchini Foogath (Mooroongkai) 

This popular foogath is raditionally made with "drumsticks" in South India, the immature green pods of a tree,
Moringa oleifera. Other more familiar vegetables, zucchini beans, squash, eggplants or potatoes, can be substitued with excellent results.  I used zucchini because, you know, they are as abundant here this time of year as drumsticks in Sri Lanka.

Preparation and Ingredients:

Wash the 1 lb.zucchini well and cut into convenient sizes, about 1/4" slices. Then they are boiled in water with a little salt until done, just crisp tender, and drained.

Fry lightly in 2 Tbsp. ghee or olive oil for 3 or 4 minutes the following:

1 onion  and 2 or 3 cloves of garlic, sliced thinly
1 teaspoon ground turmeric
1/2 teaspoon ground cumin seed
1/2 teaspoon of less of cayenne

Now stir in 2 Tbsp. of coconut, finely shredded, and the prepared zucchini.  Salt to taste, and stir lightly as the zucchini should not be broken. In the case of eggplant, do not boil, but saute in a little extra oil first.


Plantain Foogath


Banana or Plantain Foogath (Kayla ka Foogath)


The plantain foogath was served with Chicken and Zucchini Satay, Simple Peanut Sauce, and Grilled corn.    It was sweet, but not too sweet.  A squeeze of lime and a sprinkling of cayenne made it all rather glorious.  The ripe plantains were a lovely coral color when I started and then turned a deeper coral yellow with the addition of the turmeric.  I like to incorporate as much turmeric as I can into my cooking since I learned that is a valuable medicinal spice for reducing inflammation.

Preparation and Ingredients:

6 raw or green bananas (plantain), cut in 1-inch lengths and soaked in cold salt water for an hour or more and drained.

In 2 Tbsp. ghee or vegetable oil, fry lightly for 3 or 4 minutes:
1 onion and 2 cloves of garlic, sliced finely.
2 or 3 fresh or pickled chillies, cut lengthwise, in halves
1/2 teaspoonful of fresh or pickled green ginger, finely minced

Then add:
1 teaspoon of ground turmeric
1/2 tespoon of ground cumin seed
1/2 teaspoon or less of cayenne

Cook on a slow fire for 3 or 4 minutes longer.  Now add the bananas or plantains.  Mix, cover the pan, and on a very gentle heat cook until the bananas are soft but not pulped.  Now stir into it half of a fresh coconut, scraped, or 3 Tablespoons of finely shredded, dried coconut.  Salt to taste.

Toss lightly and simmer for a few minutes longer with the pan uncovered.


Sunday, July 10, 2011

Vegan Chocolate Tofu Mousse Mo' Better


I went Vegan for some many months several years ago.  It wasn't too hard, except when travelling and having to stop in convenience stores for a snack.  The whole Vegan scene has gotten lots, lots better over the years.
This recipe for Vegan Chocolate Mousse really hits the mark in many ways for everyone, vegan or not.  It's delicious and amazingly simple.  It's also virtually guilt-free, especially if you believe a little chocolate indulgence is good for you.

I've made hundreds of chocolate mousses and this one ranks right up there with the best of them.  It's definitely numero uno in ease of execution and healthiness, and it tastes great too.

Silken tofu, often called soft or Japanese-style tofu has a softer consistency than regular tofu and is used in salad dressings,  sauces and desserts where a thick, creamy texture is called for.  Silken tofu often comes in an aseptic container which has a shelf life of up to a year, unopened.  Once opened, it can be refrigerated,  covered and submerged in water for up to a week.

Chocolate Tofu Mousse Recipe
Serves 6.

This is super easy.  The original recipe called for maple syrup; I substituted agave.  I also added flavoring--orange in this case, but amaretto or kahlua would work too.
I served it with whipped cream and fresh raspberries.  Whipped topping would be a choice for non-dairy and is optional.

I was worried about this setting up, but I was able to enjoy a rapturous spoonful very quickly.  It would work very nicely as a Chocolate Silk Pie in a vegan graham cracker crust

Ingredients:

1 package of silken tofu (~12 oz)
10 oz chocolate chips, about one small package. Many dark chocolate chips are vegan; check the ingredients though if this is a concern.
3 tablespoons agave syrup
1 tsp. vanilla extract (vanilla brings out the flavor of chocolate)
2-3 Tbsp. Grand Marnier, Triple Sec, Amaretto or Kahlua (optional)

Directions:

Blend tofu (preferably at room temperature) in food processor, blender, or with hand mixer until just smooth.
In a double boiler, melt chocolate chips with a tablespoon or two of water over low heat. Stir constantly.
Add agave syrup and flavorings to melted chocolate and combine.
Put chocolate & syrup blend into processor and mix with tofu until creamy.  That was easy!!!
Pour into 6 serving dishes  or layer with whipped topping and berries in clear glass parfait or wine glasses. Chill until set.

Serving options:
Fold in a half-cup of non-dairy whipped topping or whipped cream) at the end
Garnish with cut fruits
Use as a dip for fruit and graham crackers
Use as icing for cake or cookies